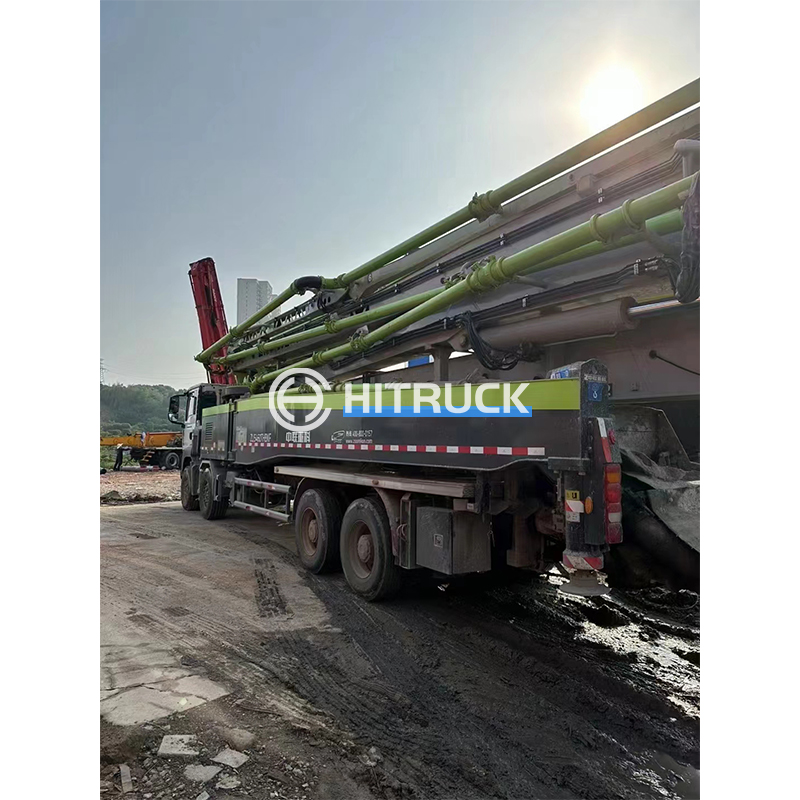
Concrete pump truck booms rely heavily on hydraulic cylinders to achieve precise and stable lifting, extending, and folding movements. These cylinders operate under high pressure, heavy loads, and harsh working conditions (such as exposure to concrete residue, dust, and temperature fluctuations), making regular maintenance and timely repairs essential to prevent sudden failures and ensure operational safety. This article details the key steps and technical considerations for repairing hydraulic cylinders of concrete pump truck booms, covering pre-maintenance preparation, disassembly, inspection, component replacement, reassembly, and post-repair testing.
1. Pre-Maintenance Preparation: Safety and Tool Readiness
Safety is the top priority before starting any repair work. First, park the concrete pump truck on a flat, solid ground and engage the parking brake. Lower the boom to a stable horizontal position (or use a support frame if the boom cannot be lowered) to relieve pressure on the hydraulic cylinder. Turn off the truck’s engine and disconnect the battery to avoid accidental activation of the hydraulic system. Next, release the residual pressure in the hydraulic circuit: slowly loosen the oil pipe joints of the cylinder (using a wrench with a torque limiter) while placing an oil pan below to collect leaking hydraulic oil, ensuring no high-pressure oil sprays out to cause injury.
For tool preparation, gather specialized tools to avoid damaging precision components. Necessary tools include: a set of torque wrenches (with a range of 0-500 N·m, suitable for tightening different specifications of bolts), a hydraulic cylinder disassembly stand (to fix the cylinder stably during disassembly), a piston rod puller (for safely removing the piston from the cylinder barrel), a ultrasonic cleaner (for cleaning small components like seals and valves), a surface roughness tester (to check the inner wall of the cylinder barrel and the surface of the piston rod), and a set of replacement parts (such as seals, O-rings, dust rings, and guide sleeves, which must match the cylinder’s model—e.g., for Sany SY5419THB pump trucks, use original seals with material specifications of nitrile rubber or fluororubber to resist high pressure and oil corrosion).
2. Disassembly of the Hydraulic Cylinder: Step-by-Step and Damage Prevention
Disassemble the cylinder in a clean, dust-free workshop (or use a dust cover if working outdoors) to prevent contaminants from entering the hydraulic system. The disassembly sequence must follow the cylinder’s structural design to avoid component deformation:
- Remove External Connections: Use a socket wrench to disconnect the oil inlet and outlet pipes from the cylinder’s end caps. Mark each pipe and joint with a label (e.g., “Inlet Pipe - Rod End”) to avoid misconnection during reassembly. Plug the pipe ports and cylinder oil holes with clean plastic caps to prevent dust or debris from entering.
- Dismantle the End Cap and Piston Rod: Fix the cylinder barrel on the disassembly stand. Use a torque wrench to loosen the bolts connecting the front end cap (rod end) to the cylinder barrel—apply torque evenly (e.g., 80-120 N·m for M16 bolts) to prevent the end cap from tilting. After removing the bolts, use a rubber mallet to tap the end cap gently and pull it out horizontally. Then, slowly pull the piston rod (with the piston attached) out of the cylinder barrel, avoiding scratching the piston rod’s surface against the cylinder barrel’s edge.
- Disassemble Internal Components: Separate the piston from the piston rod by removing the locking nut (use a spanner with a non-slip pad to prevent the piston rod from rotating). Take out the seal assembly (including the main seal, backup ring, and buffer seal) from the piston and end cap—use a plastic pick to avoid damaging the seal grooves.
3. Component Inspection: Key Criteria for Replacement
Each disassembled component must be inspected strictly to determine whether to repair or replace it. The following are critical inspection items and standards:
- Cylinder Barrel: Check the inner wall for scratches, corrosion, or wear. Use a surface roughness tester to measure the roughness—if it exceeds Ra0.8 μm (the standard for hydraulic cylinder barrels), the barrel must be replaced. For minor scratches (depth <0.2 mm), use a fine-grit sandpaper (800-1200 mesh) to polish the surface in the direction of the cylinder’s axis, but ensure the inner diameter remains within the tolerance range (e.g., ±0.05 mm for a 160 mm inner diameter barrel).
- Piston Rod: Inspect the outer surface for dents, chrome plating peeling, or bending. Use a dial indicator to measure the straightness—if the bending degree exceeds 0.5 mm per meter, the rod must be straightened (using a hydraulic straightening machine) or replaced. Check the chrome plating thickness with a coating thickness gauge; if it is less than 0.05 mm, re-plate the rod to prevent corrosion.
- Seals and O-Rings: Examine for cracks, hardening, or deformation. Even if there are no obvious damages, replace all seals with new ones (as seals degrade over time due to oil aging and temperature changes). Ensure the new seals have the same size and material as the original—for example, use fluororubber seals for cylinders operating in high-temperature environments (above 80°C) to resist thermal aging.
- Guide Sleeve and Piston: Check the guide sleeve’s inner hole for wear—if the clearance between the guide sleeve and piston rod exceeds 0.15 mm (measured with a feeler gauge), replace the guide sleeve. Inspect the piston’s sealing grooves for deformation; if the groove depth is reduced by more than 0.1 mm, replace the piston to ensure the seal fits tightly.
4. Reassembly: Precision Operation to Ensure Sealing Performance
Reassembly is the reverse of disassembly, but precision is critical to avoid leaks or operational failures. Follow these key steps:
- Clean Components: Before assembly, clean all components (including the cylinder barrel, piston rod, and new seals) with a dedicated hydraulic oil cleaner (avoid using gasoline or diesel, which can damage seals). Dry the components with compressed air (pressure <0.4 MPa) to prevent water or residue from remaining.
- Install Seals: Apply a thin layer of hydraulic oil (the same type as the system’s oil, e.g., ISO VG46) to the new seals and install them into the seal grooves. For the main seal (e.g., a U-cup seal), ensure the lip faces the direction of oil pressure—incorrect installation will cause severe leaks. Use a seal installation tool (a plastic sleeve) to push the seal into the groove, avoiding twisting.
- Assemble Piston and Piston Rod: Screw the piston onto the piston rod and tighten the locking nut to the specified torque (e.g., 250-300 N·m for M24 nuts). Use a torque wrench to ensure even force, and lock the nut with a cotter pin (if equipped) to prevent loosening during operation.
- Install Piston Rod into Cylinder Barrel: Apply hydraulic oil to the piston rod’s surface and the cylinder barrel’s inner wall. Push the piston rod into the barrel slowly and horizontally, ensuring the piston does not collide with the barrel’s inner wall. Then, install the front end cap, align the bolt holes, and tighten the bolts in a crisscross pattern (torque must match the manufacturer’s specification—e.g., 100 N·m for M18 bolts) to ensure the end cap is sealed tightly.
- Connect Oil Pipes: Reconnect the oil inlet and outlet pipes according to the labels made during disassembly. Tighten the pipe joints with a torque wrench (e.g., 40-60 N·m for 1-inch pipes) to avoid over-tightening, which can damage the thread.
5. Post-Repair Testing: Verify Performance and Safety
After reassembly, conduct comprehensive tests to ensure the hydraulic cylinder operates normally:
- No-Load Test: Connect the battery and start the truck’s engine. Activate the boom control lever to extend and retract the cylinder 5-10 times at low speed (10-15 mm/s). Observe for leaks at the end caps and oil pipe joints—if leaks occur, stop the test immediately and check the seal installation or bolt torque.
- Load Test: Use a pressure gauge to measure the hydraulic system’s pressure during operation. Extend the boom to its maximum length and apply a load (50% of the rated load, e.g., 10 tons for a 20-ton rated boom) for 30 minutes. Check if the cylinder holds the load stably (no obvious 沉降) and if the pressure remains within the rated range (e.g., 25-30 MPa).
- Operation Test: Test the cylinder’s speed and responsiveness by adjusting the boom’s lifting and extending speed. Ensure the movement is smooth (no jitter or noise) and the speed matches the manufacturer’s specification (e.g., 30-40 mm/s for extending).
6. Maintenance Tips and Post-Repair Care
To extend the service life of the repaired hydraulic cylinder, follow these tips:
- Regular Oil Change: Replace the hydraulic oil every 2000 operating hours (or once a year, whichever comes first). Use oil that meets the system’s requirements (e.g., anti-wear hydraulic oil with a viscosity of ISO VG46) and filter the oil with a 10 μm filter to remove impurities.
- Clean the Air Filter: The hydraulic system’s air filter prevents dust from entering—clean it every 500 operating hours and replace it every 1000 hours.
- Daily Inspection: Before each use, check the cylinder for leaks, the piston rod for scratches, and the oil level in the hydraulic tank. If abnormal noises or slow movement are detected, stop operation and inspect the cylinder immediately.
Conclusion
The hydraulic cylinder is a core component of concrete pump truck booms, and its maintenance quality directly affects the truck’s operational efficiency and safety. By following the detailed steps of pre-maintenance preparation, standardized disassembly, strict component inspection, precision reassembly, and comprehensive post-repair testing, technicians can ensure the hydraulic cylinder operates reliably. Regular maintenance and timely replacement of worn components not only reduce the risk of sudden failures but also extend the service life of the entire boom system, ensuring the concrete pump truck performs stably in construction projects.